Contact Form 7 is almost iconic. It is one of WordPress’ oldest and most widely used contact form plugins. With 5 million downloads it is the most downloaded contact form plugin on WordPress. Its popularity is due to its flexibility and free features.
The problem is that Contact Form 7 doesn’t look good unless you add some CSS to style it. Fortunately, due to its popularity, a lot of themes come with prewritten styles for the form. However, if your theme doesn’t or you’re using a starter theme like Underscores or Sage you’ll want to add some CSS to make the form look nice. I’m going to show you how to style Contact Form 7 and give you some CSS that you can simply copy and paste into your own website.
A minimal starting point
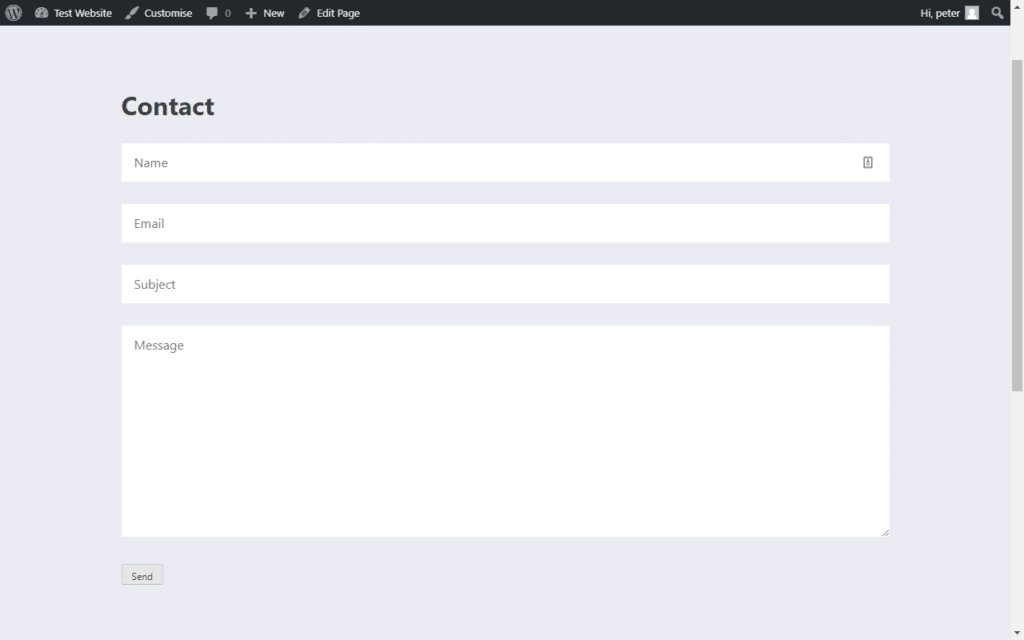
My starting point for styling the form is I’ve installed the Underscores theme on WordPress and I’ve installed Contact Form 7 and added the basic contact form it comes with to a contact page. I’ve made a container for the form that has a max-width of 960px.
As you can see, the unstyled form does the job but aesthetically it is very lacking so let’s get writing some CSS to make it look good.
Add the CSS in whatever way you prefer. For this tutorial, I’m using the CSS plugin Simple CSS because it’s a little easier to see what I’m doing other adding it to the style.css file.
Adding placeholder text
The first thing I’m going to do is remove the labels and replace them with placeholders inside the input boxes. This will make the form more minimal. I wouldn’t recommend doing this for long contact forms with lots of inputs because this would be bad for user experience but when there are so few entries it’s okay. To do this we’ll need to change the form in the WordPress backend.
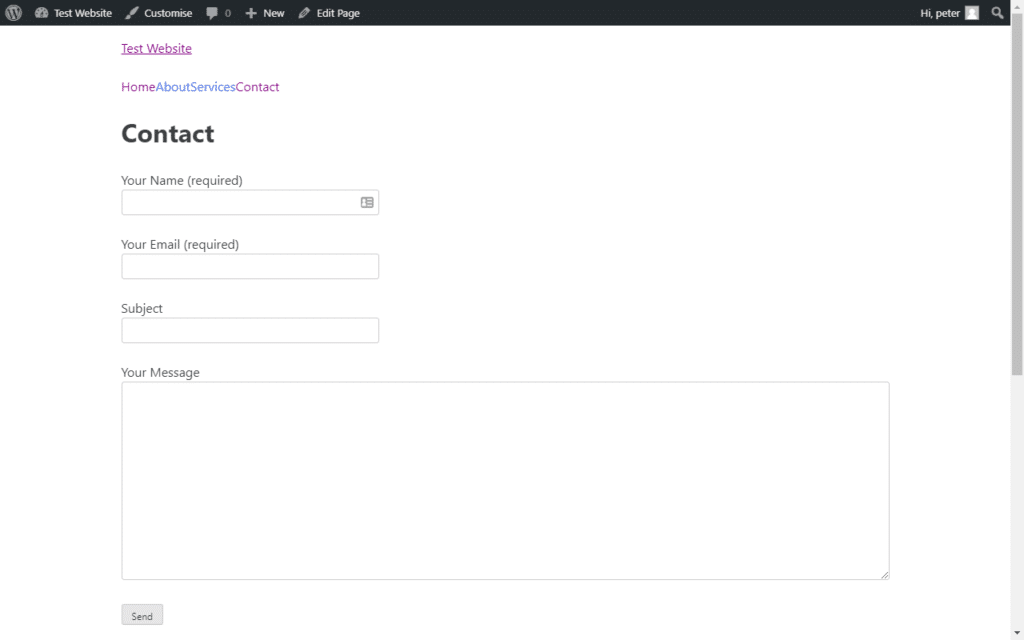
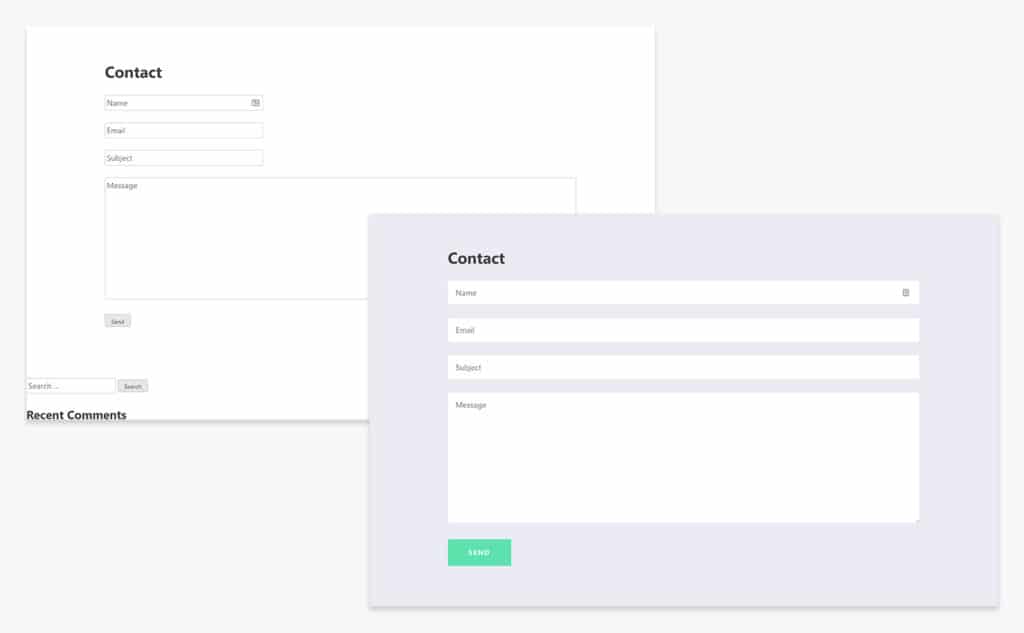
The image below shows the default contact form that comes with the plugins.
<label> Your Name (required)
    [text* your-name] </label>

<label> Your Email (required)
    [email* your-email] </label>

<label> Subject
    [text your-subject] </label>

<label> Your Message
    [textarea your-message] </label>

[submit "Send"]
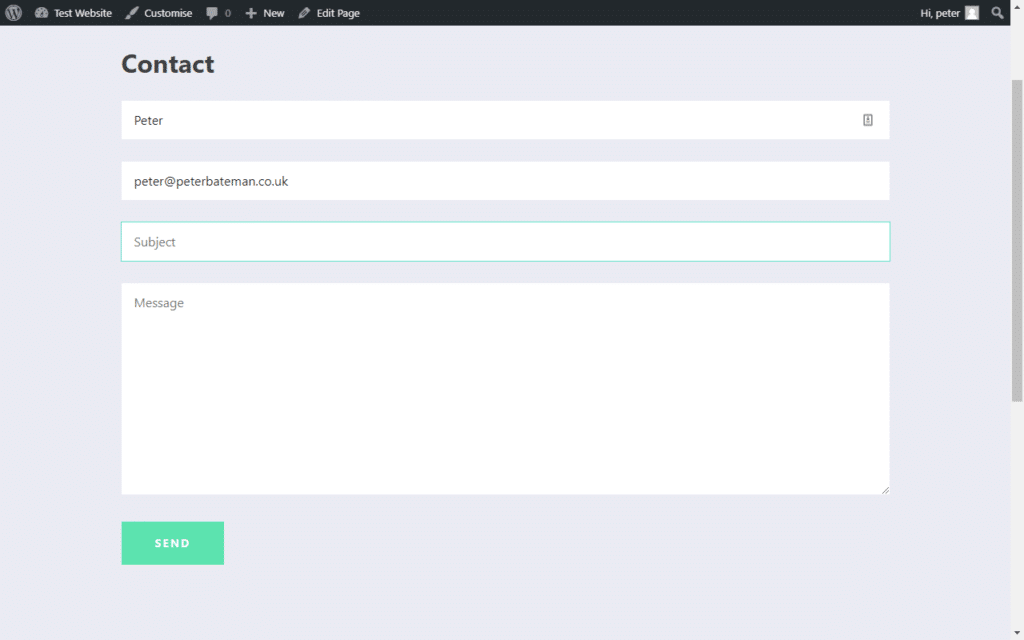
Removing the labels is a simple matter of deleting them. For example, delete “Your Name (required)”. To replace with a placeholder we need to add this option in along with the placeholder text we want to show. So for the ‘Name’ field we’ll add:
<label> [text* your-name placeholder "Name"] </label>
Doing this for the rest of the fields means we now have this in the backend.
<label>[text* your-name placeholder "Name"] </label>

<label> [email* your-email placeholder "Email"] </label>

<label> [text your-subject placeholder "Subject"] </label>

<label> [textarea your-message placeholder "Message"] </label>

[submit class:button "Send"]
I’ve also placed the label text all on the same line whereas before it was on two. This removes a <br> tag that gets added to the frontend of the form. The <br> tag adds extra space between the form inputs and this can get in the way of styling the form later on so it’s my preference to remove it so we have complete control over the space we add later.
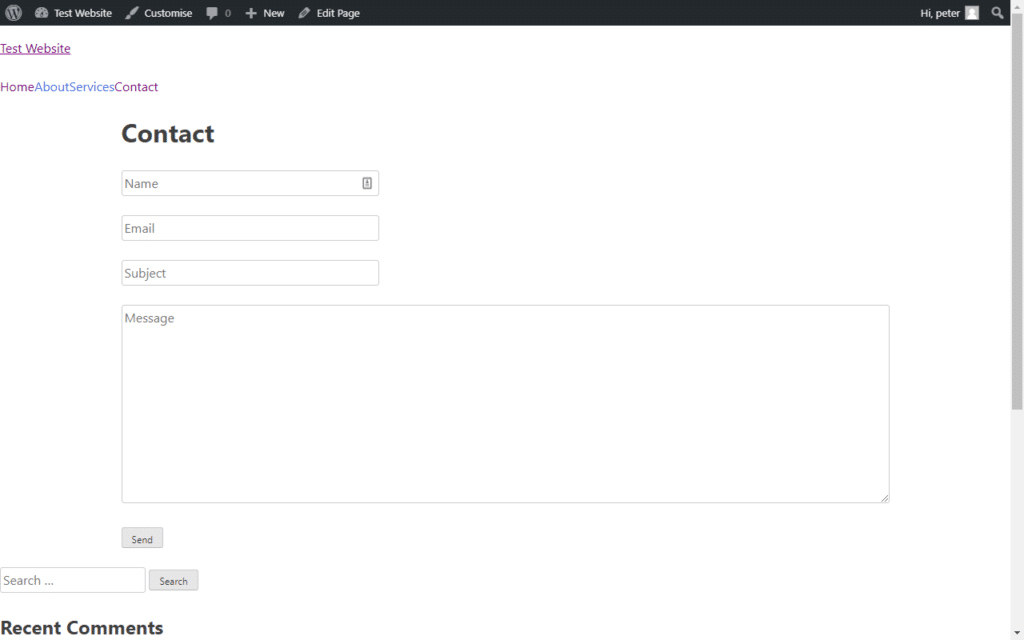
Now the form is a bit neater and already looking more modern so let’s save this and get on with writing some CSS to style the form.
CSS styles for Contact Form 7
A couple of quick fixes to make the contact form look better is to add some padding inside the input box and to make all the inputs full width. Space is so important for modern design and user experience so this alone is a big improvement to the previously small and nineties-esque form.
One handy thing to know is that all Contact Form 7 forms have the class “wpcf7-form”, this can be useful for dealing with CSS specificity. It’s good to use this selector to avoid accidentally changing the styles of another form on your website, such as an email sign up form.
.wpcf7-form input[type="text"],
.wpcf7-form input[type="email"],
.wpcf7-form input[type="url"],
.wpcf7-form input[type="password"],
.wpcf7-form input[type="search"],
.wpcf7-form input[type="number"],
.wpcf7-form input[type="tel"],
.wpcf7-form textarea {
    color: #1f252b;
    width: 100%;
    padding: 12px 16px;
    border-radius: 0;
    border: 0;
}

.wpcf7-form p {
    margin: 0 0 28px;
}

.wpcf7-text:focus,
.wpcf7-textarea:focus {
    outline: 1px solid rgba(84, 222, 197, 0.9);
    outline-offset: 0;
}
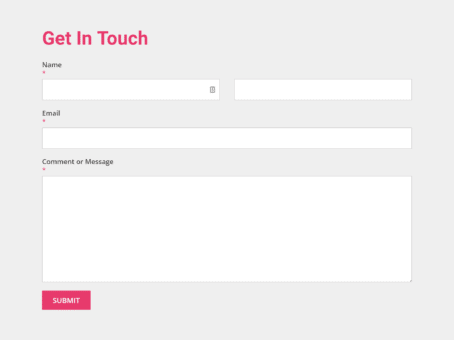
With the CSS above I’ve removed the border, added new spacing, tweaked the colours and put the form on a coloured background. This is what the form looks lie now. It’s looking a lot nicer but that button needs some serious work!
Contact Form 7 Button Class Styles
If you’re developing a theme you’ll probably be creating button styles to be consistent across your website. You can reuse the CSS you’ve written for your buttons by adding a class to the contact form submit button. So if you have written button styles for the class ‘button‘ you can add this class to the submit button.
Adding a class in Contact Form 7 is very simple. Here I’ve added the class of ‘button‘ to the submit button.
[submit class:button "Send"]
Adding the class alone won’t override all of the default Contact Form 7 styles so to do this you can either add !important to the end of all your CSS or add the ‘.wpcf7-form’ before ‘.button‘ because this makes it more specific.
.wpcf7-form .button {
    background-color: #14e2ae;
    border: 0;
    color: #fff;
    border-radius: 1px;
    font-weight: 700;
    text-align: center;
    text-transform: uppercase;
    margin-bottom: 15px;
    width: auto;
    padding: 20px 42px;
    letter-spacing: 2px;
    font-size: 14px;
}

.wpcf7-form .button:hover {
    cursor: pointer;
    box-shadow: 0px 7px 16px -7px rgba(0, 0, 0, 0.4);
    border: 0;
}
We now have a great looking contact form!
But there’s a couple of final things to do because while it looks good at the moment when a user sends a message a success or failure message is going to show up under the form. As with the original form, the default styles for this are not pretty so let’s fix these up too.
Styling the response message box
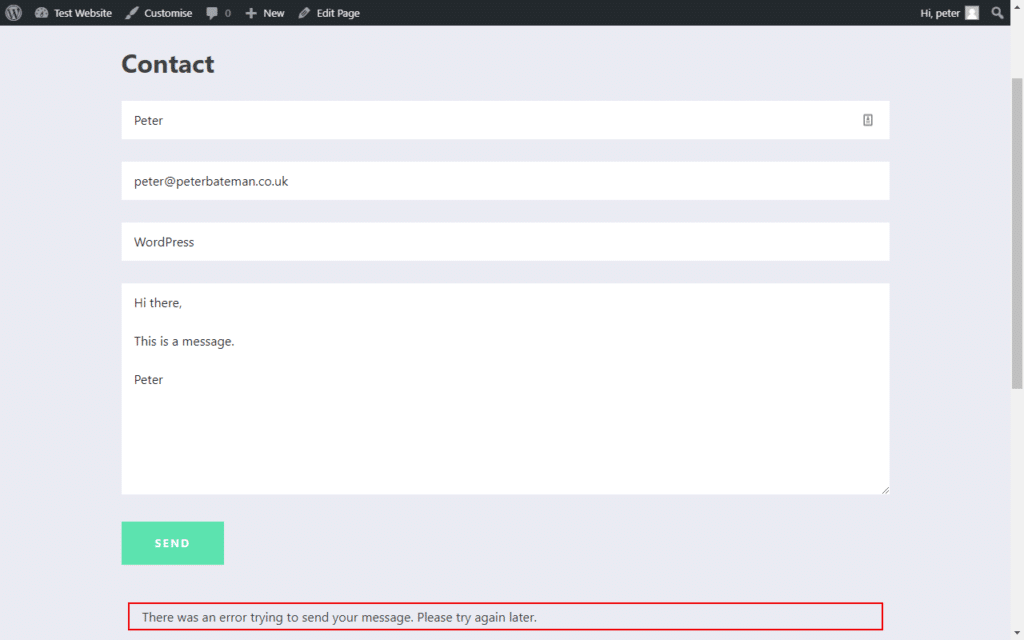
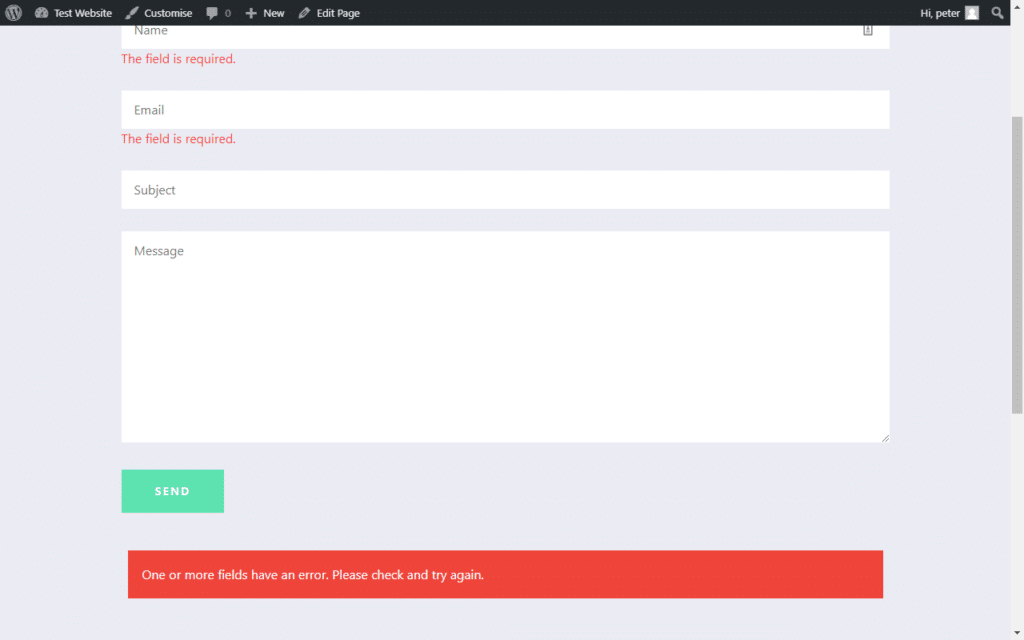
Adding more space to the response boxes and giving them a background colour will help modernise the design and make it in keeping with the rest of the form. The CSS below will make the success message use the brand colour for the background colour and the error message a nice red. I’ve also made the error tip the same red.
div.wpcf7-mail-sent-ok {
    border: 0;
    background: #5471de;
    color: #fff;
    padding: 18px;
}

div.wpcf7-acceptance-missing,
div.wpcf7-validation-errors {
    border: 0;
    background: #f9443b;
    color: #fff;
    padding: 18px;
}

span.wpcf7-not-valid-tip {
    color: #f9443b;
}
Having added these final styles the contact form has much better continuity and it’s all now ready for the world.
The entire code for how to achieve this Contact Form 7 style is below. Feel free to copy and paste this Contact Form 7 CSS example into your own project and tweak as needed.
/*
** Contact Form 7 Styles
*/

.wpcf7-form input[type="text"],
.wpcf7-form input[type="email"],
.wpcf7-form input[type="url"],
.wpcf7-form input[type="password"],
.wpcf7-form input[type="search"],
.wpcf7-form input[type="number"],
.wpcf7-form input[type="tel"],
.wpcf7-form textarea {
    color: #1f252b;
    width: 100%;
    padding: 12px 16px;
    border-radius: 0;
    border: 0;
}

.wpcf7-form p {
    margin: 0 0 28px;
}

.wpcf7-text:focus,
.wpcf7-textarea:focus {
    outline: 1px solid rgba(84, 222, 197, 0.9);
    outline-offset: 0;
}

div.wpcf7-mail-sent-ok {
    border: 0;
    background: #5471de;
    color: #fff;
    padding: 18px;
}

div.wpcf7-acceptance-missing,
div.wpcf7-validation-errors {
    border: 0;
    background: #f9443b;
    color: #fff;
    padding: 18px;
}

span.wpcf7-not-valid-tip {
    color: #f9443b;
}

/*
** Button Styles
*/

.wpcf7-form .button {
    background-color: #14e2ae;
    border: 0;
    color: #fff;
    border-radius: 1px;
    font-weight: 700;
    text-align: center;
    text-transform: uppercase;
    margin-bottom: 15px;
    width: auto;
    padding: 20px 42px;
    letter-spacing: 2px;
    font-size: 14px;
}

.wpcf7-form .button:hover {
    cursor: pointer;
    box-shadow: 0px 7px 16px -7px rgba(0, 0, 0, 0.4);
    border: 0;
}
This only takes into account the styles of course. There are still things to be done before adding the form to your website like connecting it with your email address and editing responses. For all of this stuff, there are plenty of other good tutorials out there or you can refer to the CF7 docs.
Contact Form 7 needs a bit of extra CSS to make it look good but once this is added it is one of the most capable contact form plugins on WordPress. If you’re using the plugin on your website you’ll want to check out this post I’ve written on how to only load Contact Form 7’s files when needed, this will speed up the other pages on your website that don’t use the form so it’s well worth doing.